

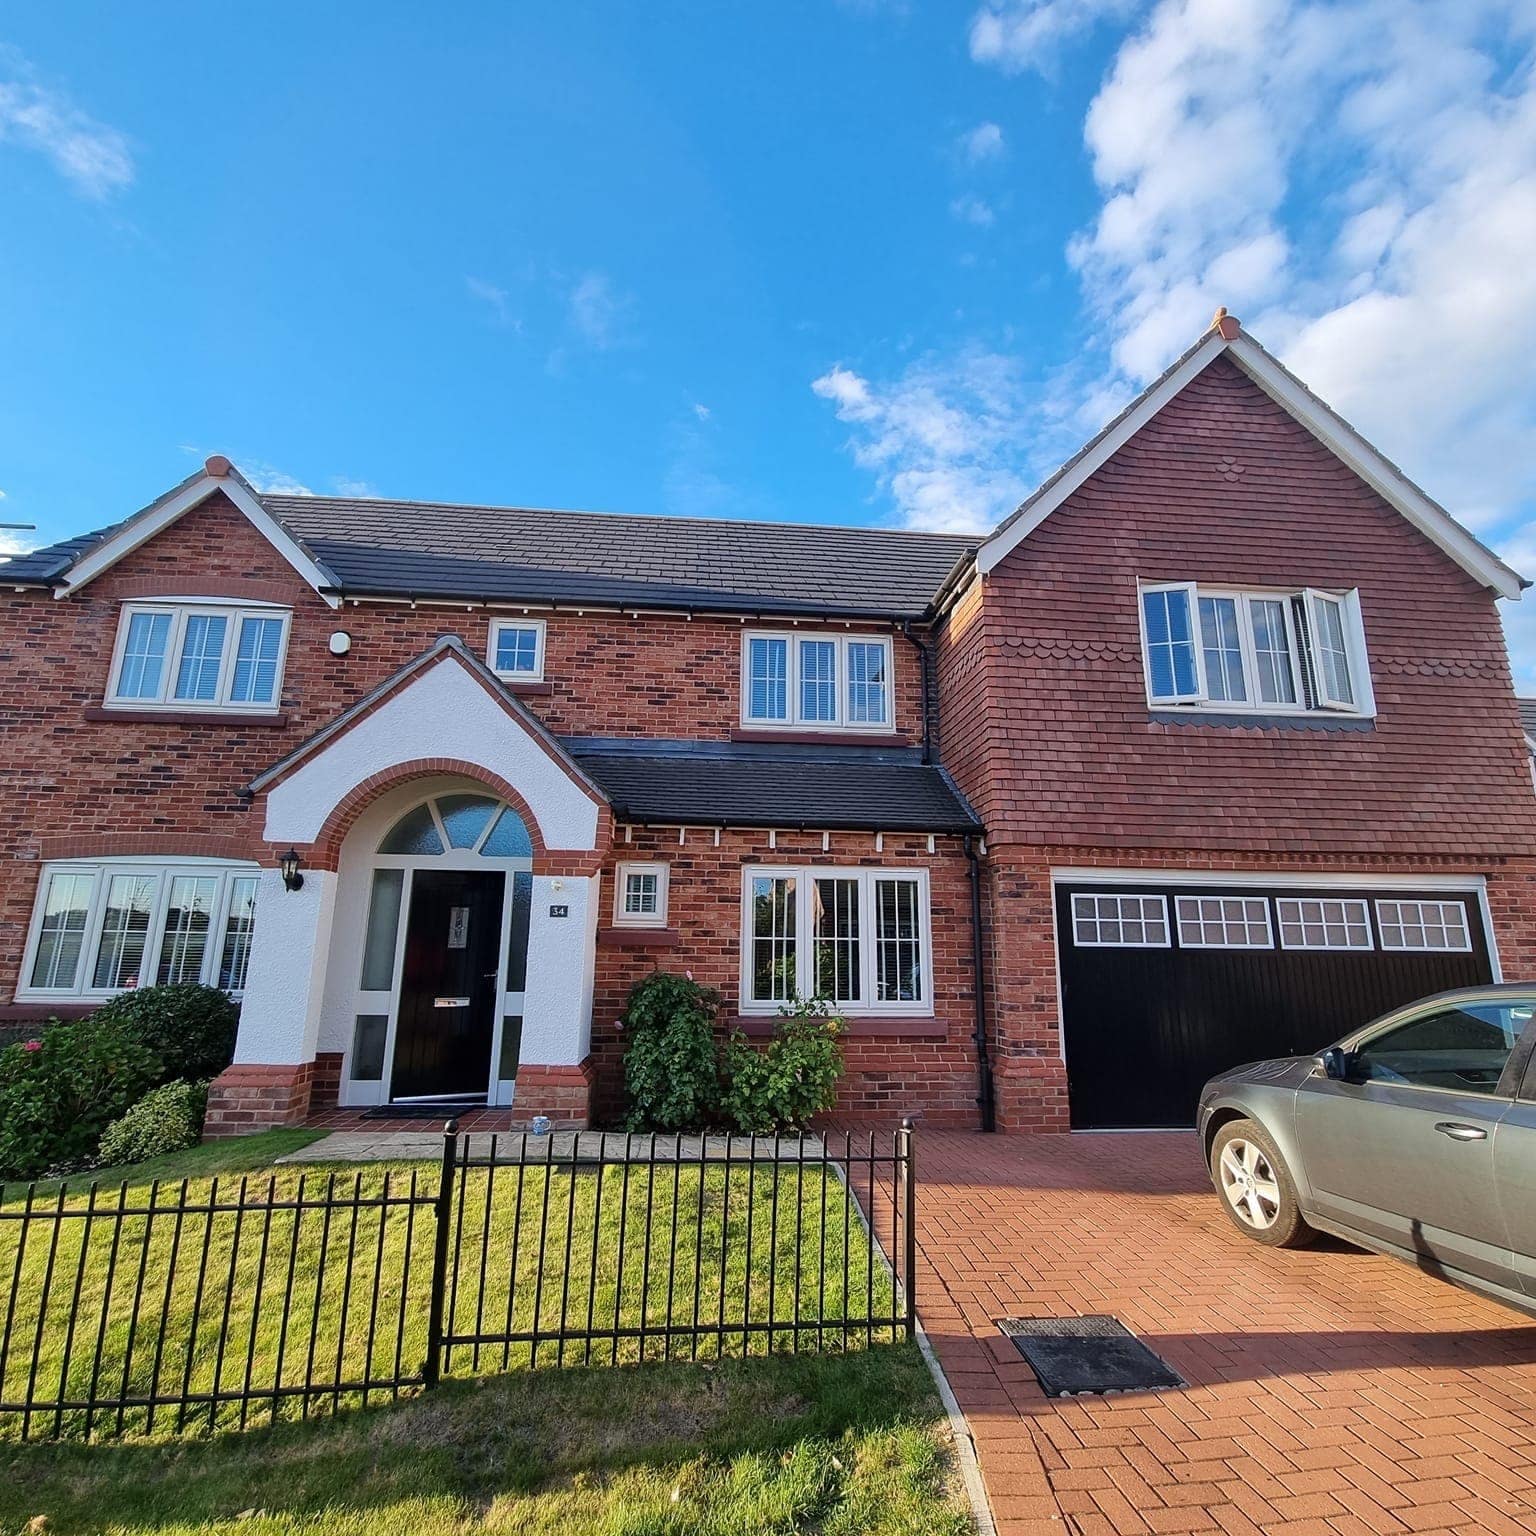
Spray finishing
Sprayed finishes on the surfaces a brush cannot do properly
Spraying is not a shortcut. It is a different way of putting paint on, and on some surfaces it is the only way to get a finish that looks like it came from a factory rather than off a brush.
Why spray
Why spray rather than brush
A brush leaves marks. On timber that is often fine, and on a panelled door I would rather hand-paint it. But on UPVC, on a steel garage door, on kitchen cabinet doors — flat, hard, non-absorbent surfaces that catch the light along their length — brush marks are all you see. The paint has nothing to sink into, so it sets exactly as it was dragged on.
Sprayed, the coating lands as an even film. It goes into the rebates and the beading and around the mouldings at the same thickness as it goes on the flat, and there is no edge where one brush load met the next. That is the whole of the difference, and it is most of the reason people ring me about it.
The trade-off is preparation. Spraying is perhaps a fifth of the time on the job and masking is most of the rest. Everything that is not being painted has to be covered properly, and if it is not, you can see exactly where I stopped caring. So most of what follows is about preparation, because that is what you are actually paying for.
Before and after
The masking is the job
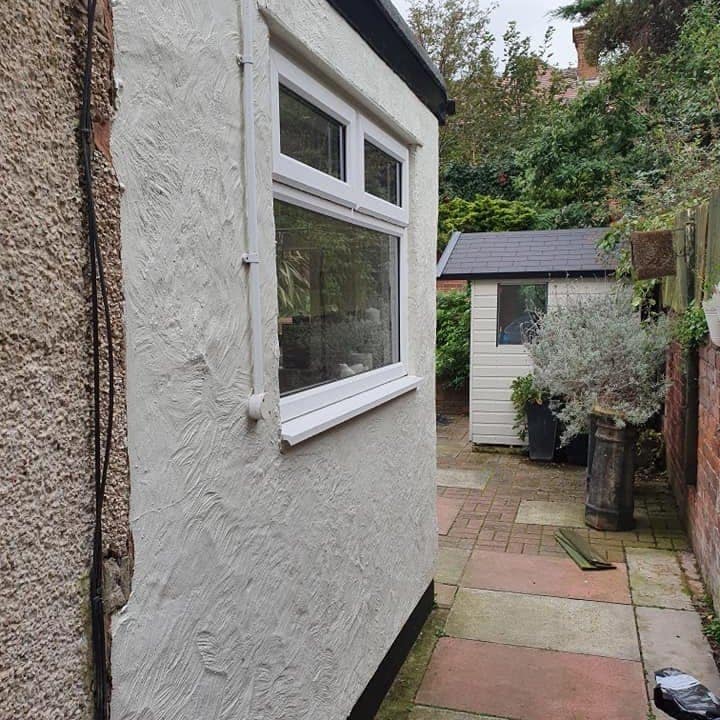
Two of mine, photographed mid-job and again at the end. Every window wrapped, the repairs patched in, the ground sheeted — and then the finish that preparation pays for.
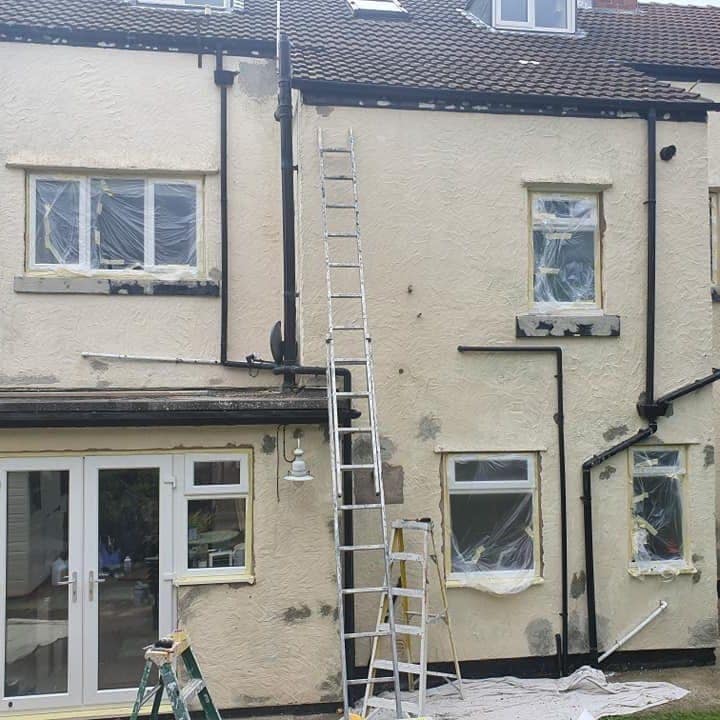 Before
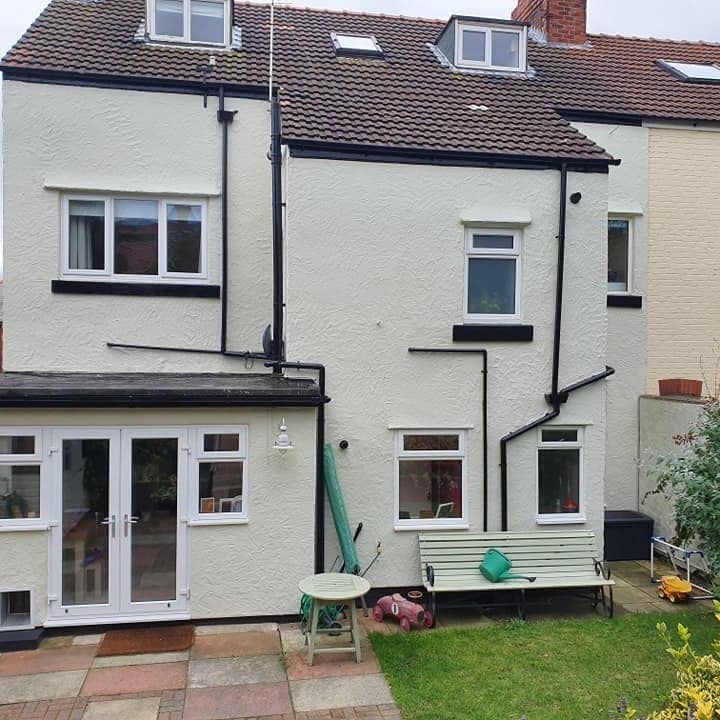 After
After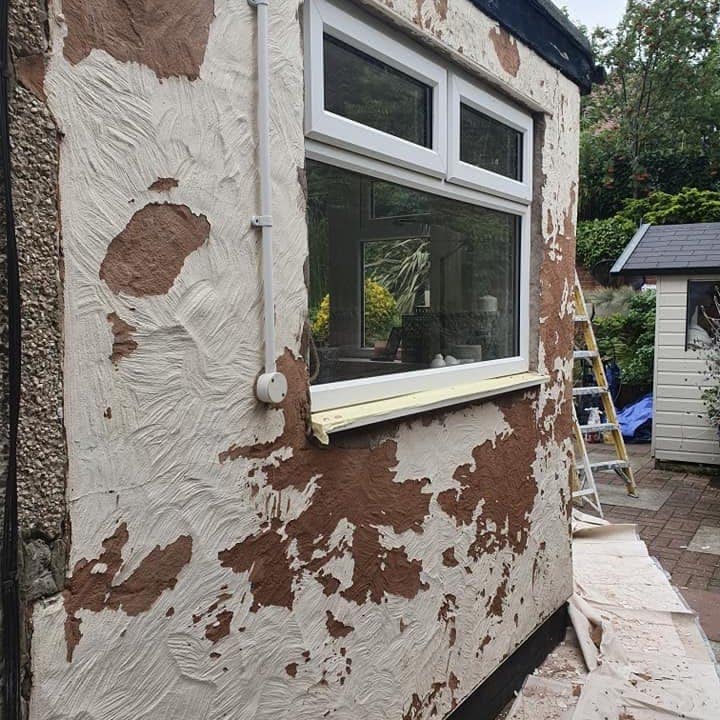 Before
 After
AfterSpray finishing · 01
UPVC windows, doors and conservatories
Can UPVC actually be painted, and does it last?
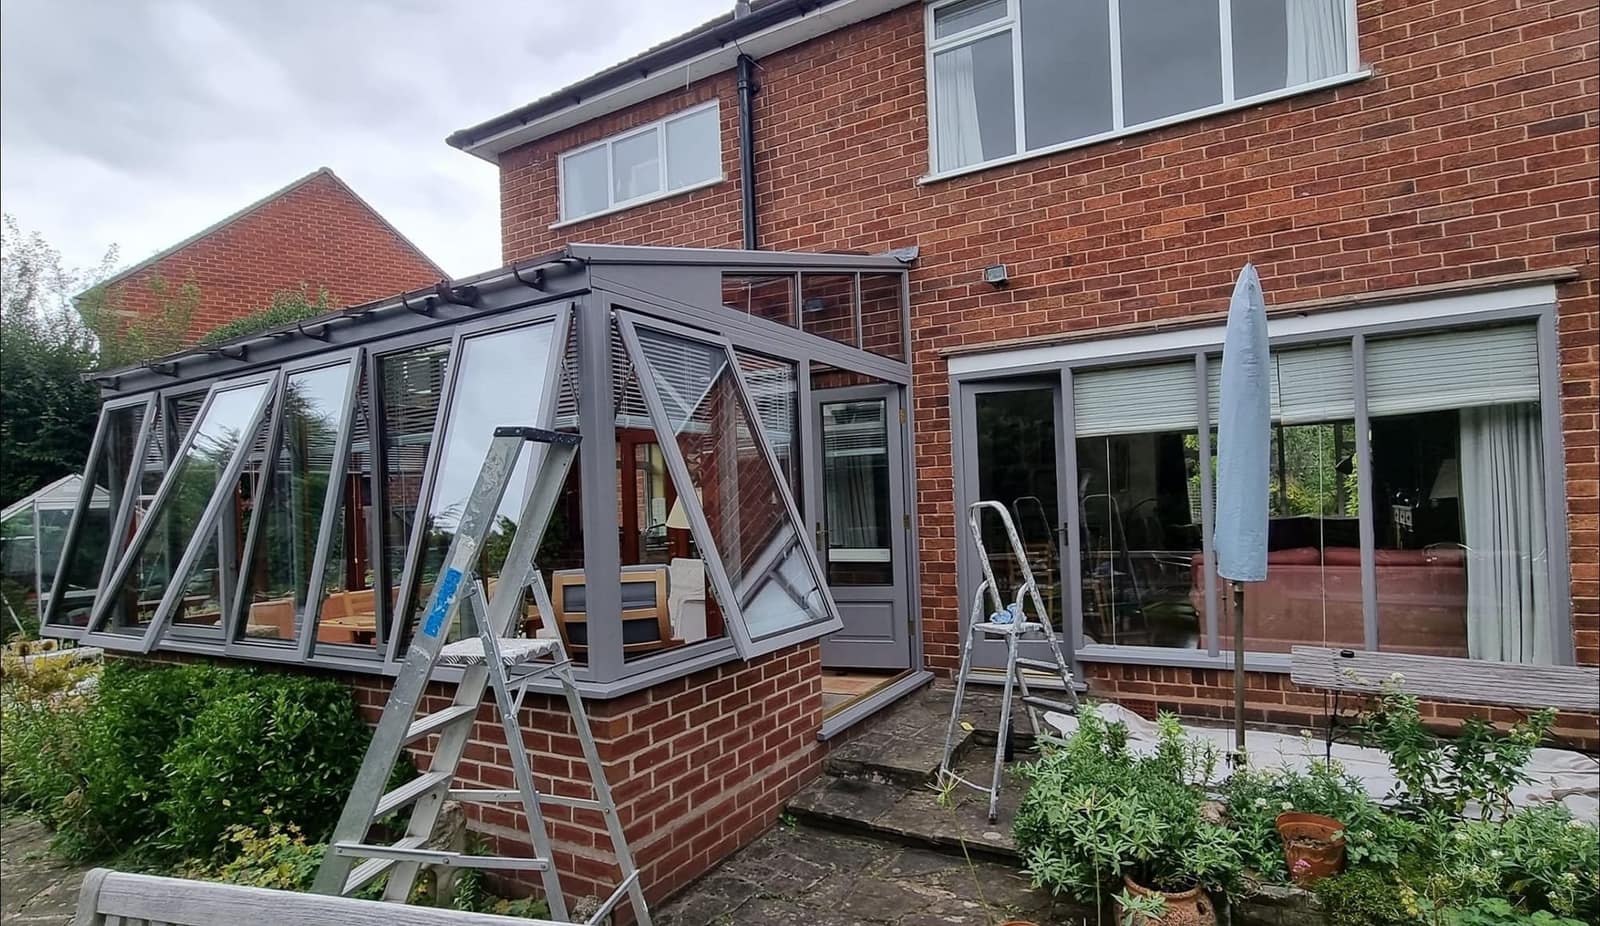
Yes, and it lasts if the preparation is right. UPVC fails for one reason: paint that was never made to stick to rigid plastic, put onto a surface that was not degreased first. Cleaned, keyed and primed with a system made for PVCu, a sprayed finish stays put and can be recoated later.
Why sprayed, not brushed
- UPVC has no absorbency at all, so brush marks never level out — they cure exactly as they were laid on and every one of them shows in daylight.
- A window frame is mostly edges, rebates and beading. A brush drags thin on an edge and pools in a rebate; a sprayed film sits at the same thickness across both.
- Masked properly, the line where the frame meets the glass is a hard, straight edge. Cut in by hand it is as straight as the hand that cut it.
- The finish can be matched to a colour rather than to whatever the frames were moulded in, which is usually why people want it done — going from white to a grey or a black without replacing the windows.
What I spray
- Window frames, sills and trims
- Front and back doors, including the frame
- Conservatory frames, box gutters and capping
- Fascias, soffits and cladding in UPVC
- Garage door surrounds and porch frames
Preparation, in order
Most of the job. Most of the quote.
Wash the frames down and get the accumulated grime and any old polish off.
Degrease with a solvent wipe. This is the step that decides whether the job lasts, and it is the step that gets skipped — plasticiser and silicone polish on the surface will reject any coating on top of it.
Key the surface with a fine abrasive so the primer has something to hold. Rigid PVCu is glass-smooth from the mould.
Rake out and replace any perished sealant, so it is not painted over and then shrinking back under the new finish.
Mask the glass, the gaskets and the rubber seals, the handles, hinges and trickle vents. The seals are masked, not painted — paint on a gasket cracks the first time the window shuts on it.
Sheet the sills, the brickwork below, the path, and anything of yours or your neighbour’s that is downwind.
Adhesion primer made for rigid plastic, then two topcoats.
What’s included
What goes on, how many coats, how long.
- Preparation
- Wash, solvent degrease, abrade, mask
- Primer
- Adhesion primer formulated for rigid PVCu
- Topcoats
- Two, spray-applied
- Finish
- Satin, matt or gloss — sample sprayed first
- Colour
- Any RAL or BS colour, matched to a sample
- Typical house of windows
- To confirm
- Recoatable later
- Yes — a keyed and cleaned coat takes another
- Guarantee
- To confirm
What it will not do
The honest list. Read this before you book anybody, not just me.
- It has to be dry, and it has to stay dry while the coating goes off. In the north west that means I watch the forecast and sometimes I move the date. I would rather move it than spray into rain.
- Above roughly 10°C, and not in strong wind. Wind carries overspray, and overspray lands on cars and next door’s conservatory. If the wind is up, I stop.
- If a previous coat of paint is flaking or peeling, that has to come off first — I cannot bond a new finish to a failing one, and pretending otherwise just moves the failure a year down the line.
- Painting UPVC does not fix a broken window. Blown double glazing, cracked frames, failed hinges and dropped doors are all repairs, not decorating. I will tell you what I can see, but I am not a window fitter.
- Sprayed UPVC is a coating on top of the plastic, not the colour of the plastic itself. It is a very good finish, and it is not the same thing as a factory-fused foil. Anyone telling you it is identical has not looked closely at either.
- Dark colours on a south-facing elevation run hotter than white did. It is generally fine on modern frames and it is worth a conversation before you pick black.
Spray finishing · 02
Garage doors
Is it worth spraying a garage door instead of replacing it?
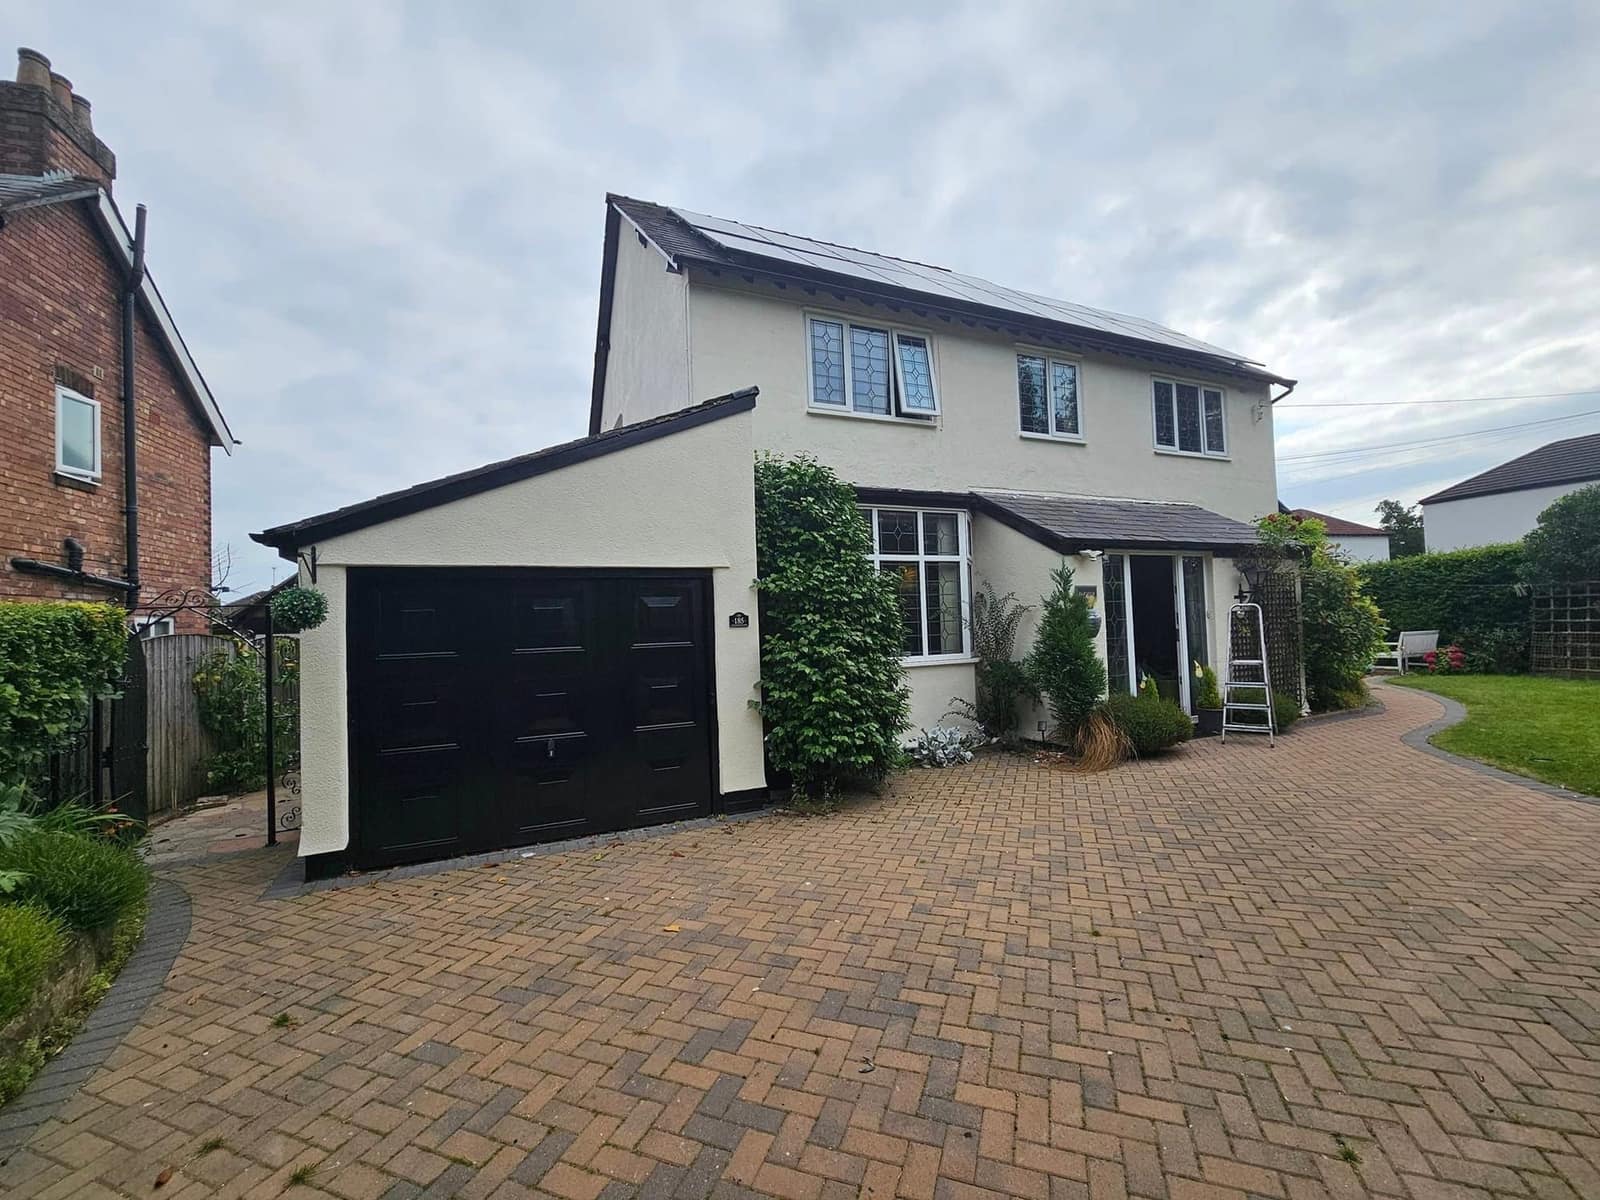
Usually, yes — if the door still works. A sound steel or GRP door that has gone chalky and faded is a coating problem, not a door problem, and it costs a fraction of a replacement. If the door is rusted through or the mechanism has gone, spraying it is money spent on something that needs taking off anyway.
Why sprayed, not brushed
- A garage door is one large flat panel facing the street. It is the worst possible surface to brush: every mark runs the full width and the low evening sun finds all of them.
- Ribbed and panelled doors are a series of edges and returns. Sprayed, they take an even film; brushed, the returns end up thin and the corners end up heavy.
- Steel doors are usually failing as a coating, not as a door — chalked, faded, with rust starting at the bottom edge and the fixings. That is repairable.
- It can be done with the door in place. Masked and sheeted, I spray it hung as it is, so the garage is not open to the street overnight.
What I spray
- Up-and-over steel doors
- Sectional and roller doors
- GRP and timber doors
- The frame, the surround and the lintel while I am there
Preparation, in order
Most of the job. Most of the quote.
Wash the door down and get the chalked, oxidised surface off — on a faded steel door that comes away as a powder and nothing will stick to it.
Degrease. Garage doors collect road film and exhaust dirt at the bottom.
Any rust taken back to sound metal and spot-primed with a rust-inhibiting primer. Rust left under a topcoat carries on rusting and lifts the paint from underneath.
Key the existing coating so the new one has a mechanical grip.
Mask the surround, the glazing if it has any, the handle and lock, and the door seal. Sheet the drive, the path and the wall above.
Primer where the substrate needs it, then two topcoats.
What’s included
What goes on, how many coats, how long.
- Substrates
- Steel, GRP, aluminium, timber
- Rust treatment
- Abraded to sound metal, inhibiting primer
- Topcoats
- Two, spray-applied
- Finish
- Satin or gloss
- Colour
- Any RAL or BS colour
- Door stays hung
- Yes — sprayed in place, masked
- Typical single door
- To confirm
- Guarantee
- To confirm
What it will not do
The honest list. Read this before you book anybody, not just me.
- If the door is rusted through, or the springs and mechanism have had it, spraying is the wrong spend. I will say so on the day rather than take the work.
- Same weather rules as any exterior spraying: dry, above roughly 10°C, and calm enough that overspray is not drifting down the street onto parked cars.
- The door cannot be used until the coating has hardened off. On a single door that is usually the rest of the day, and I will tell you when rather than guess.
- A door with a heavy pebbled or embossed texture will look like a well-finished textured door, not like a flat one. Spraying follows the surface it is given.
Spray finishing · 03
Exterior spraying — render, cladding, fascias
What is the advantage of spraying the outside of a house?
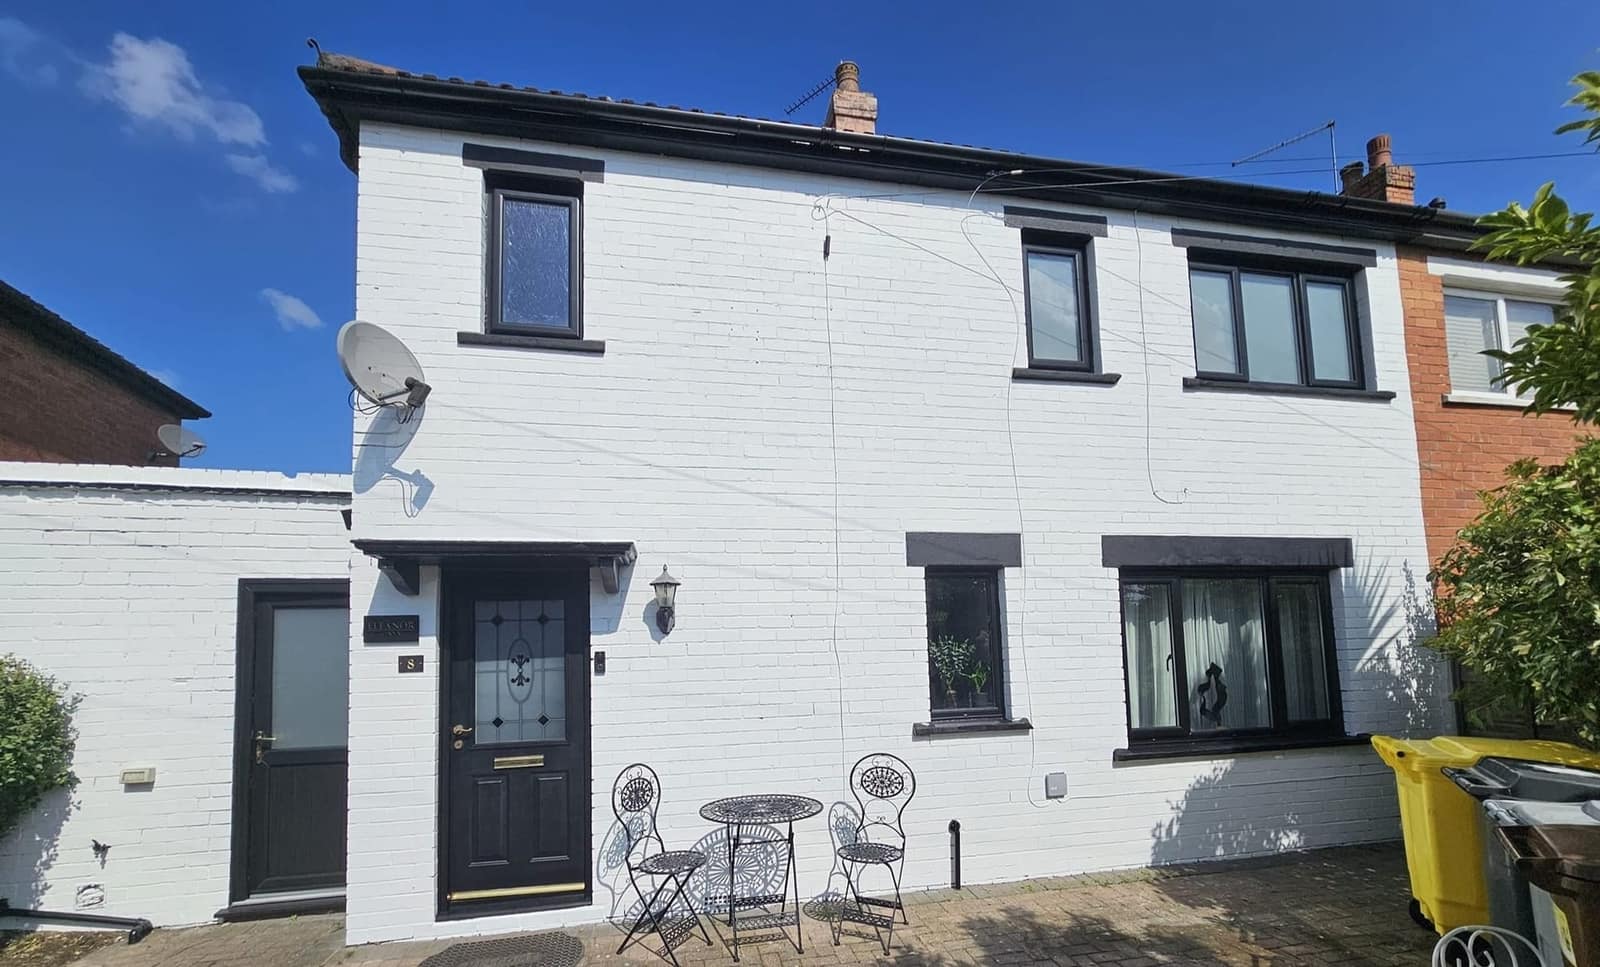
Coverage on texture, and speed on scale. A roller bridges over the hollows in a rough render and leaves them thin; sprayed, the coating gets into the texture properly. On a whole elevation that also means the wall goes on in one pass, wet edge to wet edge, so there is no banding where one day’s work met the next.
Why sprayed, not brushed
- Textured render has a surface area far larger than it looks. A roller touches the high points; a sprayed coat fills the profile.
- A full elevation done in one pass has no lap marks. Roller-applied over two days on a hot wall, you can often see where the join is.
- Fascias, soffits and gutters are awkward, narrow and high up. Sprayed from a tower they take an even coat in a fraction of the time on a ladder.
- It puts a heavier, more even film on than a roller does, which on a weather-facing wall is the point of the exercise.
What I spray
- Rendered and pebbledashed walls
- Cladding, weatherboard and shiplap
- Fascias, soffits, bargeboards and gutters
- Garage and outbuilding walls
- Metal railings, gates and balustrades
Preparation, in order
Most of the job. Most of the quote.
The wall gets cleaned down and any organic growth killed off, then rinsed. Painting over green growth feeds it under the coating.
Cracks raked out and made good; loose and hollow render cut back to something sound. Paint does not bridge a moving crack and I will not pretend it does.
Bare and powdery patches stabilised so the topcoat is not soaking into dust.
Windows, doors, glazing and vents masked. Paths, drive, borders and plants sheeted. Cars moved, and next door spoken to before I start rather than after.
Two coats of an exterior masonry coating, spray-applied, back-rolled where the surface calls for it.
What’s included
What goes on, how many coats, how long.
- Substrates
- Render, pebbledash, brick, cladding, metalwork
- Preparation
- Clean, treat growth, make good, stabilise
- Coats
- Two, spray-applied
- Access
- Tower or scaffold as the elevation needs
- Making good
- Cracks and loose render before any coating
- Typical semi, two elevations
- To confirm
- Guarantee
- To confirm
What it will not do
The honest list. Read this before you book anybody, not just me.
- Weather decides the date, not the diary. Masonry has to be dry through, so after a wet spell I wait — and after a very wet spell I wait longer than you would think.
- Wind stops exterior spraying completely. Overspray travels, and I am not putting masonry paint on your neighbour’s car to keep to a schedule.
- Above roughly 10°C and not in direct baking sun on the wall being coated, which flashes the surface off before it can level.
- A coating is not a repair. Damp coming through a wall, failed render, a blocked cavity or a leaking gutter will still be there under fresh paint, and covering it up makes it harder to find later.
- Pebbledash that is already loose will keep coming off. Spraying it does not glue it back on.
Spray finishing · 04
Furniture and kitchen doors
Can kitchen cupboard doors be sprayed instead of replaced?
If the carcasses and hinges are sound, yes — and it is the single biggest change you can make to a kitchen for the money. I take the doors, drawer fronts and end panels off, clean the grease off them, key and prime them, and hang them back sprayed. A solid timber or MDF door takes it well. A peeling vinyl-wrapped door does not.
Why sprayed, not brushed
- A cabinet door is a flat slab you look at from a foot away in kitchen lighting. There is nowhere for a brush mark to hide.
- Sprayed flat and horizontal, the coating levels under its own weight — that is where the depth in a good finish comes from.
- Cabinet doors get handled constantly, so the film wants to be even. A thin edge on a door lip is where the first chip appears.
- Consistency across twenty doors. Sprayed, they match; brushed, the twentieth one is not quite the first one.
Photograph to come
Kitchen doors laid out flat and sprayed, ideally in the masked space they were done in. Or a finished kitchen shot straight on, with a close frame of a door edge to show the film.
What I spray
- Kitchen doors, drawer fronts, end panels and cornice
- Fitted and freestanding wardrobes
- Sideboards, dressers, chests of drawers
- Bookcases and built-in cupboards
- Interior doors, off their hinges and sprayed flat
Preparation, in order
Most of the job. Most of the quote.
Doors, drawer fronts and handles come off, and every piece is labelled so it goes back where it came from.
Degrease everything, twice on a kitchen. Cooking grease is invisible and it will reject paint.
Fill the old handle holes if the handles are changing, and de-nib the flat.
Key the surface. On melamine, laminate or a previously varnished piece this is the difference between a finish that lasts and one that peels off on a fingernail.
Adhesion primer suited to the substrate, sanded between coats, then two topcoats sprayed.
Carcasses masked and cut in on site while the doors are off being sprayed.
What’s included
What goes on, how many coats, how long.
- Substrates
- Timber, MDF, melamine, previously painted or varnished
- Doors removed
- Yes — sprayed flat, labelled, refitted
- Primer
- Adhesion primer matched to the substrate
- Topcoats
- Two, hard-wearing, spray-applied
- Finish
- Matt, eggshell or satin
- Typical kitchen, 15–20 doors
- To confirm
- Full hardness
- Handle with care for the first few days
- Guarantee
- To confirm
What it will not do
The honest list. Read this before you book anybody, not just me.
- Vinyl-wrapped or foil-faced doors that are already lifting at the edges cannot be saved by paint. The wrap keeps peeling and takes the coating with it.
- MDF that has swollen with water — usually under a sink or by a dishwasher — needs the door replacing. Paint over a swollen edge stays a swollen edge.
- Paint takes days to reach full hardness even when it is dry to the touch. Kitchen doors want treating gently for the first week, and I will say which week.
- A sprayed door is a very good painted door. It is not a factory-baked lacquer finish, and if that is what you are expecting, buy doors.
- I need somewhere to spray — a garage, a room I can mask off, or the doors go away with me. That is worth sorting out before the start date.
How it works
How a spray job runs
Six steps, and the long one is the masking rather than the spraying.
I come and look at it
Spraying cannot be quoted off a photograph. I need to see what the existing coating is doing, whether it will take another, and what is going to need masking — because the masking is the quote.
A sample, if colour is the question
On anything where the colour is the decision, I spray a sample and leave it with you. A colour on a chart in a shop is not a colour on your house in north west daylight.
Masking and sheeting
The longest part. Glass, seals, handles, vents, the ground, the planting, and anything downwind. If I have got this wrong you will see it in the finish, so I take the time.
Prep and prime
Clean, degrease, key, make good, spot-prime. Nothing gets a topcoat until the surface under it is sound and dry.
Spray, two coats
The quick bit. On an exterior it happens on the day the weather allows, which is why I would rather give you a week than a date.
Unmask, check, clean up
Everything comes off, I go round the whole job in daylight looking for the bits I have missed, and the site goes back the way I found it. You get a message with photographs at the end of each day, including the days it rained and I could not spray.
Free quote
Ask about spraying
Tell me what it is and roughly where you are. Spraying cannot be quoted off a photograph — I need to see what the existing coating is doing and what needs masking — but I can tell you on the phone whether it is worth me coming out.
Or just ring me
- Free, and no obligation attached to it
- Same-day answer, usually
- One job at a time, so the dates are real